How to draw Fractals - L-Systems
Wed 08 January 2020 by A Silent Llama
In the last post we ended up with a renderer for a Koch Snowflake. It took a lot of effort and explaining. In this post we’ll go over a system that allows us to draw various different fractals using exactly the same framework. It’s much easier to understand and code.
It’s All Relative
Part of what made drawing the previous fractal difficult was having to keep track of all the coordinates and angles. It’s a lot like trying to give directions as a list of GPS coordinates. While that might be a good fit for a robot we humans tend to give directions in a completely different way. If you wanted to get to my daughter’s school I might tell you to travel down the road and take the first left and then the next right. I don’t have to specify where you are - if you’re following the directions each next instruction will make sense.
This is the difference between absolute coordinates and relative coordinates. Relative coordinates are always given depending on where you are at that moment.
Imagine drawing the Koch fractal with relative coordinates. I could simply tell you to draw a line and then turn left 60 degrees. I could tell you to draw another line, turn right 120 degrees, draw another line turn left 60 degrees and draw the final line. That’s a lot easier and doesn’t involve any trigonometry at all.
Turtles all the way down.
It’s long been a tradition in computer graphics to use highly trained Drawing Turtles when we want to draw with relative coordinates. Why turtles exactly is a small mystery but probably relates to the great mathematical contributions done by tortoises and their work with Zeno. Drawing turtles have evolved to carry a pen and to draw precisely straight lines. (The pen is fixed to the turtle’s belly which allows them to draw as they move). Furthermore they always know the exact angle they’re facing and respond to instructions with methodical ease.
We’ll need to procure a drawing turtle. We don’t want to get our hands dirty in the fast paced world of animal trading so lets just create one in Rust.
We’ll start from scratch with a new project (cargo new fractals2) with the same Cargo.toml as last time. Let’s create a turtle.rs file:
// turtle.rs
use image::{GenericImage, Rgb, RgbImage};
use imageproc::drawing::BresenhamLineIter;
use std::path::Path;

pub struct Turtle {
    pen: bool,
    x: u32,
    y: u32,
    angle: f32,
    canvas: RgbImage,
}
We represent our Turtle with a simple struct. The pen boolean controls whether the turtle is actually drawing or simply moving around. The x and y coordinates represent the current position of the turtle, the angle is the current direction the turtle is facing and the canvas is the RgbImage we’ll be drawing on.
Now we need to add the instructions we’ll need the turtle to follow. We’ll start with the basics - turning left and right and moving forward (while drawing a line):
// turtle.rs
impl Turtle {
    pub fn new(width: u32, height: u32) -> Turtle {
        Turtle {
            pen: true,
            // By default place the turtle in the centre of the canvas
            x: width / 2,
            y: height / 2,
            angle: 0.0,
            canvas: image::ImageBuffer::new(width, height),
        }
    }

    pub fn left(self: &mut Self, angle: f32) {
        self.angle -= angle;
    }

    pub fn right(self: &mut Self, angle: f32) {
        self.angle += angle;
    }
We added the code for creating a new turtle (note that it takes width and height for the canvas) and the code for controlling the angles. It’s pretty simple to handle turning - we just add or subtract our turning angle from the angle the turtle is currently facing. The only tricky bit will be moving forward but we covered everything we need in the last blog post:
// turtle.rs
pub fn forward(self: &mut Self, steps: f32) {
    let dx = (steps as f32 * to_radians(self.angle).cos().round()) as i32;
    let dy = (steps as f32 * to_radians(self.angle).sin()) as i32;
    let x1 = (self.x as i32 + dx) as u32;
    let y1 = (self.y as i32 + dy) as u32;

    if self.pen {
        // The line function from the previous blog post.
        line(&mut self.canvas, self.x, self.y, x1, y1);
    }

    // Move the turtle to the new coordinate.
    self.x = x1;
    self.y = y1;
}
We use the same trigonometry formula from last time to work out where we’ll end up if we take some number of steps in the direction of the angle we’re facing. This was the hardest part. Everything from here on is going to be super easy.
Putting it all together we get:
// turtle.rs
use image::{GenericImage, Rgb, RgbImage};
use imageproc::drawing::BresenhamLineIter;
use std::path::Path;

fn to_radians(angle: f32) -> f32 {
    (angle * std::f32::consts::PI) / 180.0
}

fn line(image: &mut impl GenericImage<Pixel = Rgb<u8>>,
        x0: u32,
        y0: u32,
        x1: u32,
        y1: u32) {
    for (x, y) in BresenhamLineIter::new((x0 as f32, y0 as f32), (x1 as f32, y1 as f32)) {
        image.put_pixel(x as u32, y as u32, Rgb([150, 150, 150]));
    }
}

pub struct Turtle {
    pub pen: bool,
    pub x: u32,
    pub y: u32,
    pub angle: f32,
    pub canvas: RgbImage,
}

impl Turtle {
    pub fn new(width: u32, height: u32) -> Turtle {
        Turtle {
            pen: true,
            x: width / 2,
            y: height / 2,
            angle: 0.0,
            canvas: image::ImageBuffer::from_pixel(width, height, Rgb([255, 255, 255])),
        }
    }

    pub fn init(self: &mut Self, x: u32, y: u32, angle: f32) {
        self.x = x;
        self.y = y;
        self.angle = angle;
    }

    pub fn forward(self: &mut Self, steps: f32) {
        let dx = (steps * to_radians(self.angle).cos()).round() as i32;
        let dy = (steps * to_radians(self.angle).sin()).round() as i32;
        let x1 = (self.x as i32 + dx) as u32;
        let y1 = (self.y as i32 + dy) as u32;

        if self.pen {
            line(&mut self.canvas, self.x, self.y, x1, y1);
        }
        // Move the turtle to the new coordinate:
        self.x = x1;
        self.y = y1;
    }

    pub fn left(self: &mut Self, angle: f32) {
        self.angle -= angle;
    }

    pub fn right(self: &mut Self, angle: f32) {
        self.angle += angle;
    }

    pub fn save(self: &mut Self) {
        self.canvas
            .save(&Path::new("rendered.png"))
            .expect("Unable to save rendered png");
    }
}
I also added a save call that saves the Turtle’s canvas to a ‘rendered.png’ file.
That’s it let’s test this turtle out!
In main.rs:
// main.rs
mod turtle;
use turtle::Turtle;

fn main() {
    let width: u32 = 400;
    let height: u32 = 400;
    let mut t = Turtle::new(width, height);

    t.forward(100);
    t.right(90.0);
    t.forward(100);
    t.right(90.0);
    t.forward(100);
    t.right(90.0);
    t.forward(100);
    t.right(90.0);

    t.save();
}
This produces the following image:
Nice! Turtles are tops at following instructions! Let’s add a few more instructions just to make our lives easier:
// turtle.rs
impl Turtle {
    // -- snip --
    pub fn init(self: &mut Self, x: u32, y: u32, angle: f32) {
        self.x = x;
        self.y = y;
        self.angle = angle;
    }
    // -- snip --
}
Init will allow us to set the starting point and angle for our turtle. By default the turtle starts in the middle of the canvas but that makes our square draw off centre. This will allow us to start things off from a position that makes more sense. Let’s try:
// main.rs
mod turtle;
use turtle::Turtle;

fn main() {
    let width: u32 = 400;
    let height: u32 = 400;
    let mut t = Turtle::new(width, height);

    t.init(150, 150, 0.0);
    t.forward(100);
    t.right(90.0);
    t.forward(100);
    t.right(90.0);
    t.forward(100);
    t.right(90.0);
    t.forward(100);
    t.right(90.0);

    t.save();
}
Now we get this:

But wait - what happens if we change our starting angle?
// main.rs
// -- snip --
t.init(150, 150, 45.0);
// -- snip --

We didn’t have to worry about calculating angles or sin or cos. That’s the beauty of relative coordinates. We can now do some more complicated things with our turtle.
// main.rs
fn main() {
    let width: u32 = 400;
    let height: u32 = 400;
    let mut t = Turtle::new(width, height);

    t.init(150, 150, 0.0);
    for _ in 0..13 {
        t.forward(200);
        t.left(150);
    }

    t.save();
}
Almost no code at all and we get this:
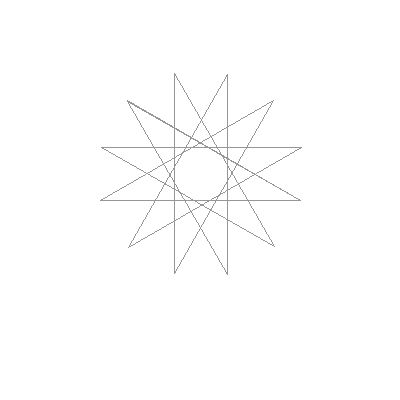
Pretty.
So - what does this have to do with Fractals? Let’s try and draw our Koch pattern again:
// main.rs
fn main() {
    let width: u32 = 800;
    let height: u32 = 300;
    let mut t = Turtle::new(width, height);

    t.init(10, 250, 0.0);
    t.forward(260);
    t.left(60.0);
    t.forward(260);
    t.right(120.0);
    t.forward(260);
    t.left(60.0);
    t.forward(260);

    t.save();
}
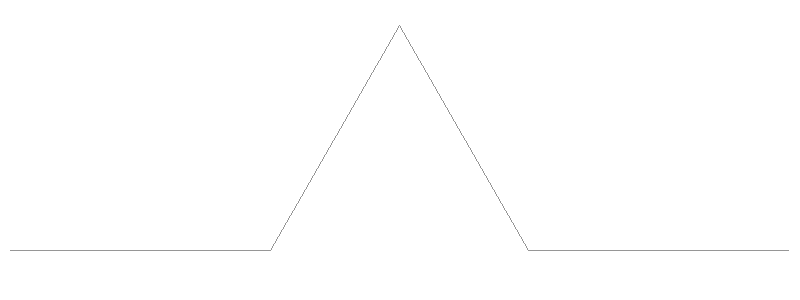
Not bad - the turtle got it first time…
L-Systems
Let’s give each instruction our turtle can follow a symbol. We’ll use F for forward, + for a left turn and - for a right turn. We can then give our Koch instructions as a list of these symbols:
F+F--F+F
(Note that we need to turn right twice to undo our initial left turn). Let’s teach our turtle to follow these instruction lists:
// main.rs
fn execute_instructions(turtle: &mut Turtle,
                        instructions: &str,
                        steps: u32,
                        angle: f32) {
    // This runs over our instruction string and executes each instruction:
    for c in instructions.chars() {
        match c {
            'F' => turtle.forward(steps),
            '+' => turtle.left(angle),
            '-' => turtle.right(angle),
            _ => {
                // Ignore anything else
            }
        }
    }
}

fn main() {
    let width: u32 = 800;
    let height: u32 = 300;
    let mut t = Turtle::new(width, height);

    t.init(10, 250, 0.0);
    execute_instructions(&mut t, "F+F--F+F", 260, 60.0);
    t.save();
}
This will render the same Koch pattern.
A biologist named Aristid Lindenmayer introduced the idea of using lists of symbols of instructions and then manipulating them according to some rules. In his honour these systems are called L-systems. Consider this: the Koch pattern can be drawn with the instructions F+F—F+F. To create a fractal we need to replace each line in our pattern with the same pattern again. Now each F in our instructions will be a line so we can simply replace each F in the instruction list with the pattern. Let’s try:
Our new instruction list after we’ve replaced each F with the pattern once:
F+F--F+F+F+F--F+F--F+F--F+F+F+F--F+F
And the code:
// main.rs
fn main() {
    let width: u32 = 800;
    let height: u32 = 400;
    let mut t = Turtle::new(width, height);

    t.init(10, 350, 0.0);
    execute_instructions(&mut t, "F+F--F+F+F+F--F+F--F+F--F+F+F+F--F+F", 85, 60.0);
    t.save();
}
And we get:
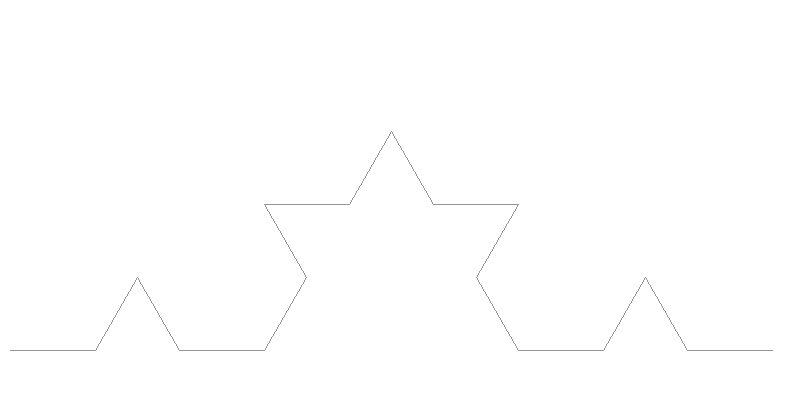
This is a lot more flexible.
Some preliminaries: for an L-system we carefully seperate our starting point from our replacement pattern. We call this starting point the axiom. This is from mathematics terminology - we’ll call our pattern replacement a rule. An axiom in mathematics is a statement made without proof that we accept to be true and in L-systems the axiom is the starting point that wasn’t generated by a rule. For the Koch snowflake our axiom is simply F since we just need a single line to kick off the replacements. We iterate our fractal by replacing our lines according to our rule over and over again.
One thing to note here is that we have to be careful with our step size. In the previous blog post we didn’t have to worry because the length was calculated as we went. Here we need to make sure that our step is the right size. We could calculate this (we divide our length by 3 every iteration so the formula length / (3iterations) would work) but I find it’s interesting to experiment with different values.
We can see that this looks like a single iteration of our fractal pattern. If we do the replacement again we’ll get a second iteration. Let’s try 5 iterations:
// main.rs
fn expand_instructions(iterations: u16) -> String {
    // Start with our initial instructions - the 'axiom':
    let mut instructions = "F".to_string();
    let mut pattern = "F+F--F+F".to_string();

    for _i in 0..iterations {
        let mut buffer = String::new();

        // Replace every 'F' with the pattern - this is our 'rule':
        for c in instructions.chars() {
            if c == 'F' {
                buffer.push_str(pattern);
            } else {
                buffer.push(c);
            }
        }

        // Set our instructions to what we just generated:
        instructions = buffer;
    }

    instructions
}

fn main() {
    let width: u32 = 800;
    let height: u32 = 300;
    let mut t = Turtle::new(width, height);

    t.init(10, 250, 0.0);
    let iterations = 5;
    execute_instructions(
        &mut t,
        expand_instructions(iterations),
        3.2,
        60.0
    );
    t.save();
}
This brings us back to where we were at the end of the last blog post:
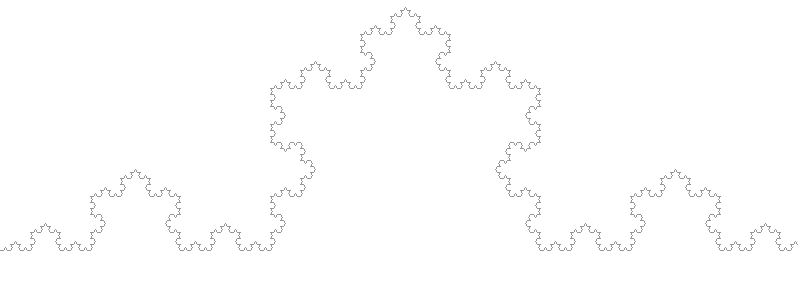
But we have a lot more power now. Remember I asked what would happen if we chose a square instead of a triangle for our replacement pattern? In the last blog post we would have had to rewrite our entire program. Now we can see that we need the following rule to draw a square-like pattern: F+F-F-F+F. We’ll need to set our turning angle to 90° - let’s see what happens:
// main.rs
// -- snip --
let mut pattern = "F+F-F-F+F".to_string();
// -- snip --
let iterations = 5;
execute_instructions(
    &mut t,
    expand_instructions(iterations),
    3.2,
    90.0 // Need to turn at 90 degrees to draw squares:
);
And now we get:
We have a completely different image simply by changing some parameters! I don’t know about you but I find that amazing. By the way - this is still a Koch fractal, just a variant.
We can now play with our starting conditions by changing the axiom. Going back to the original triangle pattern - what happens if we start with a triangle? To draw a basic triangle we’ll need the instructions: +F—F—F. We’ll also slight refactor things so we can play around a little more easily:
// main.rs
fn expand_instructions(axiom: String, pattern: String, iterations: u16) -> String {
    let mut instructions = axiom;
    // -- snip --

fn main() {
    let width: u32 = 1000;
    let height: u32 = 1000;
    let mut t = Turtle::new(width, height);

    t.init(90, 750, 0.0);
    let iterations = 5;

    execute_instructions(
        &mut t,
        expand_instructions("+F--F--F".to_string(), "F+F--F+F".to_string(), iterations),
        3.2,
        60.0
    );
    t.save();
}
This produces:
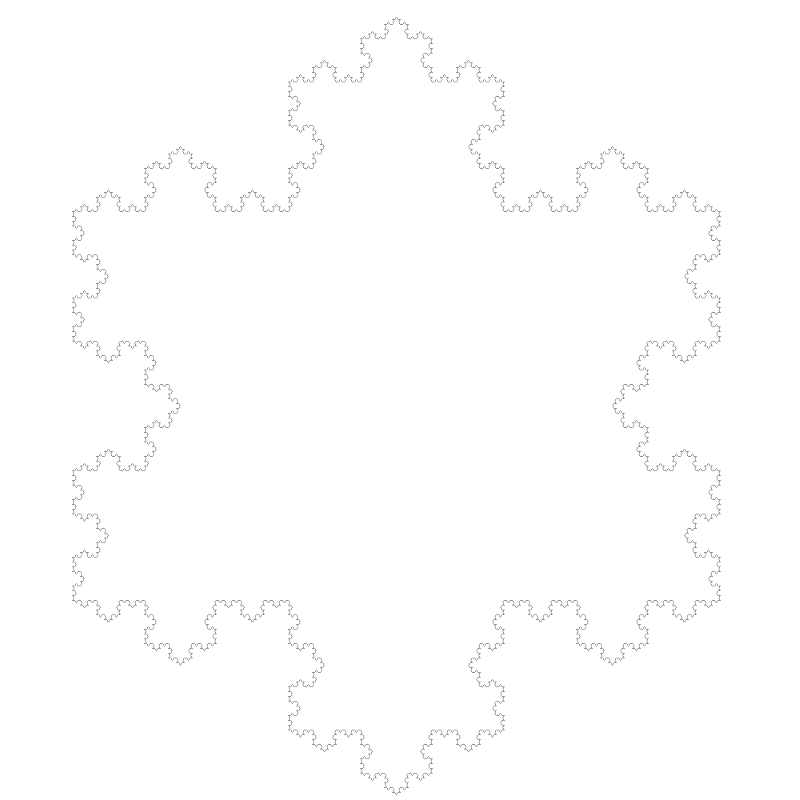
This is the full Koch snowflake in all its glory.
I think we’ll leave it there for now. In the next post we’ll extend the system and refactor things a bit to make it easier to experiment.
Source code for this post is available at Gitlab.